Removing Viruses From Thumb Drives
You’ve probably come across Thumb Drive Viruses when you connect your thumb drive to a computer at work or at school.
These viruses copy themselves onto a thumb drive as soon as it is connected to an infected computer and the second they’re connected to any other computer, the virus spreads on that machine as well.
Since you may not be able to remove the virus from the infected computer (due to insufficient admin privileges, etc.), you can ensure that the virus on the thumb drive does not spread on another machine.
Suppose you’re not sure if your thumb drive is infected or not and wish to connect it to your computer without taking the risk of infecting it. To ensure that the virus does not start, Hold Shift and insert the thumb drive into the USB Port. This will prevent the AutoPlay function from being executed from the thumb drive, and hence does not start the virus when the thumb drive is inserted.
Now that you’ve connected your thumb drive, it’s time to check if it has a virus or not. Most Thumb drive viruses can be detected by using these 2 techniques:
1) Check Drive Icon:
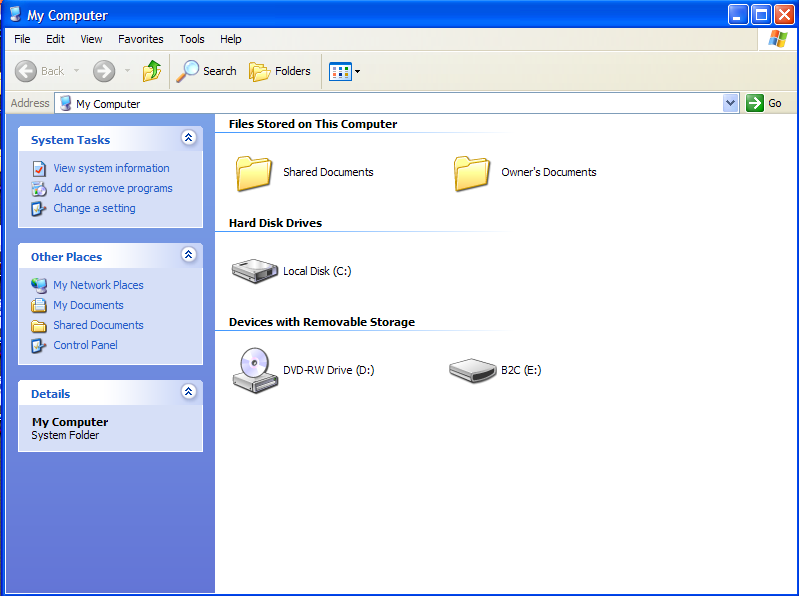
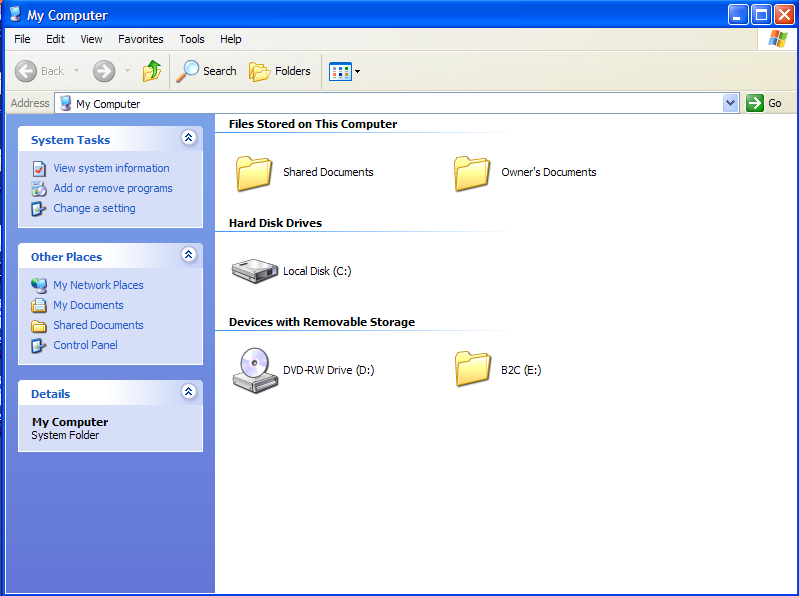
Although the virus is an exe file, it uses the directory icon to fool users into clicking it. Though not all viruses do this, it’s still worthwhile to check if the icons have been changed.
This what an uninfected thumb-drive looks like:
An infected thumb-drive looks like this:
Now, if you want to access the files in this pen-drive, DO NOT DOUBLE-CLICK THE THUMB-DRIVE ICON as it starts AutoPlay and will execute the virus program.
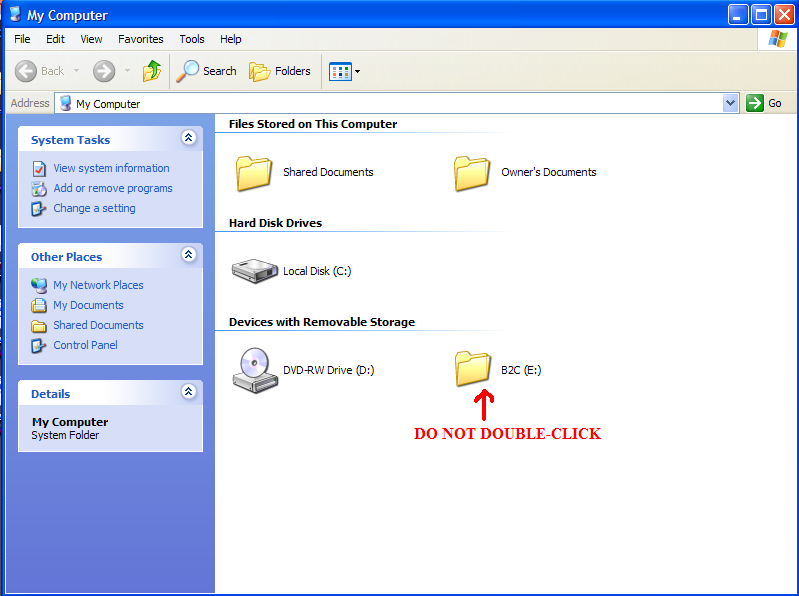
Instead, right-click the icon and choose Explore OR click the Folders icon on the menu bar and select the thumb drive from the left pane as shown below:


Now it’s time to find the viruses and remove them. If you look at your directory contents it will look like this:

You won’t see any viruses as they are hidden. What’s worse, since they are also marked as system files some anti-virus programs ignore virus scans on such files. This is the time to use the second technique.
2) The ATTRIB Test
Click Start->Run and type cmd and press Enter. Once you see the command prompt, type [USBDriveLetter]: and press Enter i.e. E: in this example.
Now type attrib and press Enter. The output should look like this:
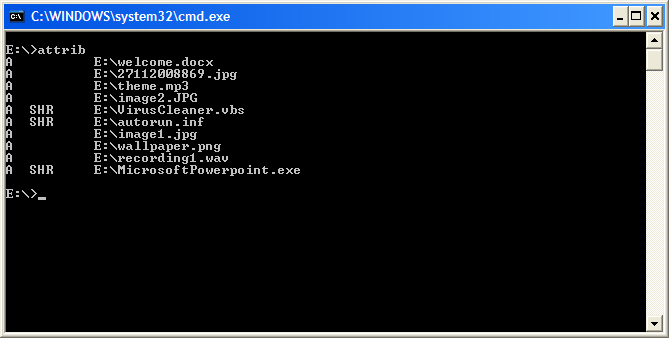
You’ll notice a few files with the SHR File attributes in this window. One of these files will be autorun.inf, which instructs the OS which applications to run when the thumb drive is inserted. The other files will be .exe, .vbs or .pif files and are usually the viruses that you are looking for.
To remove all file attributes type this command: attrib -s -h -r <filename.extension>
After you type this command for all the filenames set with SHR file attributes, type attrib again and observe the result:

Cool, now open Windows Explorer and you’ll notice that the viruses are now visible.
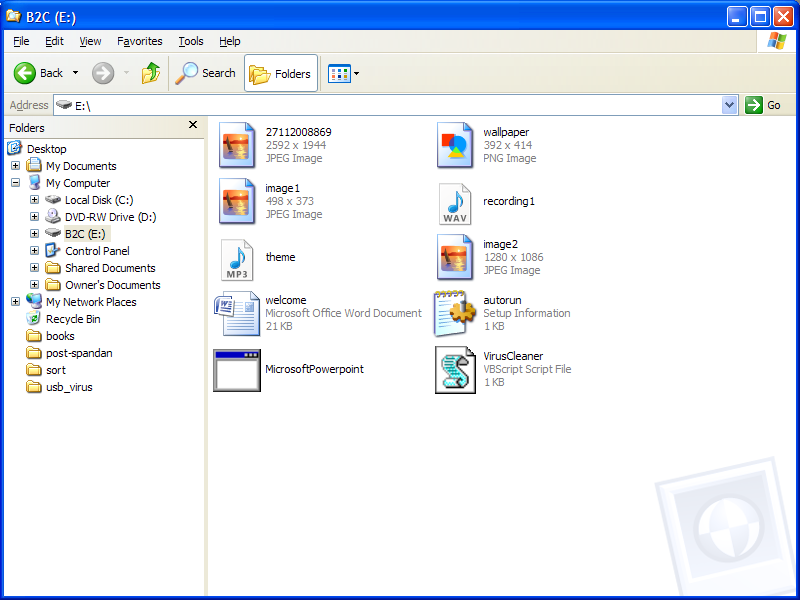
The next part is simple, choose all the viruses and delete them. You should also delete the autorun.inf file unless your thumb drive is made by SanDisk (SanDisk thumb drives depend on autorun.inf to start its own utility programs). If your thumb drive is manufactured by SanDisk, open the autorun.inf file and simply remove all lines that contain the virus filenames.
That’s all. Your Thumb Drive is no longer infected.
There’s something you should take care of though. Many Thumb Drive viruses make copies of itself in every directory on the thumb drive. If that’s the case then you will have to perform the above steps for each folder or use attrib -s -h -r /s *.* to unset SHR attributes of all files in your thumb drive. You can then delete them individually.
To play safe, instead of relying on pressing Shift every time you insert your thumb drive, it is wiser to disable autorun for all removal drives so that Autorun.inf is never executed when your thumb-drive is inserted.
To do that in Windows XP, download a powertoy called TweakUI and disable autoplay for all removable devices as shown below:
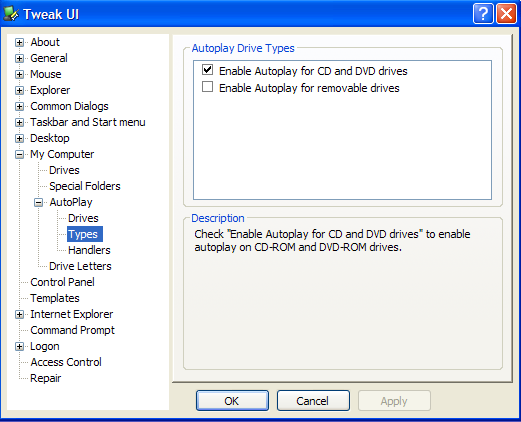
Once that is done, you no longer have to press Shift to disable autorun every time you connect your thumb drive.
However, you will still need to use the attrib command to unset file attributes and delete the files manually.
You can also use Ninja PenDisk to do the same thing automatically but I suggest doing this on your own as Ninja Pendisk may not be able to detect and remove all viruses.
UPDATE:
Some “USB-Viruses” hide all directories on your thumb drive and replace them with exe files (i.e. the virus) having the same name.
In that case, change your attrib command to this:
attrib –s –h –r /s /d *.*
This will make all the hidden directories visible again.